こんにちは! GIMLEチームの太田です。
残暑も少しマシになってきた気がしますね(* ^ - ^ *)
季節の変わり目、体調崩しやすいかと思いますので、気をつけてお過ごしくださいね。
さて、今回は、
「AzureでのIaCを体得していくために、実践を通してBicepを学んでみよう」
ということで、Bicepの完全モードでのデプロイをテーマに、実践をしていきたいと思います。
※以前に AzureにおけるIaC Bicepに入門してみた という記事を書いていますので、Bicepを初めて触る方は、先にこちらを読んでおいていただくとスムーズかと思います。
- はじめに
- 前提となる知識・用語
- 1. 準備
- 2. 初回のリソースデプロイ
- 3. リソースの削除
- 4. リソースの追加
- 5. リソースの更新
- 6. お片付け
- おわりに
- 参考情報リンクまとめ
- Bicepを使ってみる 記事一覧
はじめに
Bicepを使ったデプロイでは、Bicepで書いたファイルがARM(Azure Resource Manager)テンプレートに変換されてから、デプロイされます。
また、ARMテンプレートのデプロイでは、増分更新をする増分モードと、完全更新をする完全モードの2種類があります。
今回は、完全モードを使用したBicepファイルからのデプロイを、以下のような流れで実践してみました。
- 準備
- 初回のリソースデプロイ
- リソースの削除
- リソースの追加
- リソースの更新
- お片付け
本記事内で使用する用語や前提条件については、以下の「前提となる知識・用語」にまとめたので、参照ください。
では、早速いってみましょう!
前提となる知識・用語
BicepおよびAzure Resource Managerに関すること
- デプロイモード
- Azureリソースをデプロイする際の更新方法
- 増分モード
- 「実際のリソースグループ内にはあるけれど、Bicepファイルにはないリソース」について、デプロイ時にリソースを変更せず、そのまま残すデプロイモード
- 今回は、こちらは取り上げません
- 完全モード
- 「実際のリソースグループ内にはあるけれど、Bicepファイルにはないリソース」について、デプロイ時にリソースを削除するデプロイモード
- 今回は、こちらを取り上げます
- 参考:Azure Resource Manager のデプロイ モード
- What-if操作
- Azureリソースをデプロイする前に、発生する変更を確認する操作
- 参考:Bicep デプロイの What-If 操作
作業の前提条件
- Azure Portalへのログインができること
- Azureのサブスクリプションがあること
- Azure CLIおよびBicep CLIが実行できること
検証した環境
- 端末:MacBook Pro
- OS:macOS Monterey 12.5.1
- CPU:Apple M1 Max
- Azure CLIのバージョン:2.39.0
- Bicep CLIのバージョン:0.9.1
1. 準備
1.1 Azureへのサインイン
まずはAzure CLIを使って、Azureにサインインします。
以下のコマンドを実行するとブラウザで画面が開くので、サインインしましょう。
$ az login
1.2 リソースグループの作成
続いて、テスト用のリソースグループを作成します。
今回も、東日本リージョンでリソースグループを作成してみました。
$ az group create \
    --resource-group <任意のテスト用リソースグループ名> \
    --location japaneast
{
  "id": "/subscriptions/xxxxxxxx-xxxxxxxxxxxxxx-xxxxxxxxxxxx/resourceGroups/rg-blog-poc",
  "location": "japaneast",
  "managedBy": null,
  "name": "rg-blog-poc",
  "properties": {
    "provisioningState": "Succeeded"
  },
  "tags": null,
  "type": "Microsoft.Resources/resourceGroups"
}
リソースグループ名は、rg-blog-poc にしました。
以降の項目では、こちらのリソースグループ名でコマンドや実行結果を記載していきます。
2. 初回のリソースデプロイ
では、Bicepコードを書いて、リソースをデプロイしていきましょう。
今回使用するリソースは以下の2種類です。
- App Serviceプラン
- Bicepでのリソースタイプは
Microsoft.Web/serverfarms test-app-service-planという名前をつけました
- Bicepでのリソースタイプは
- App Serviceアプリ
- Bicepでのリソースタイプは
Microsoft.Web/sites test-app-20220906という名前をつけました
- Bicepでのリソースタイプは
2.1 ソースコードの作成(2つのリソース)
任意の場所に main.bicep というファイルを作成して、以下のコードを書きます。
@description('リソースをデプロイするAzureのリージョン')
param location string = resourceGroup().location

// App Serviceプランで料金プランを設定
resource appServicePlan 'Microsoft.Web/serverfarms@2021-03-01' = {
  name: 'test-app-service-plan'
  location: location
  sku: {
    name: 'F1'
  }
}

/*
App ServiceでWebアプリを作成
httpsOnlyをtrueにして、WebアプリへHTTPSでアクセスするようにする
*/
resource appServiceApp 'Microsoft.Web/sites@2021-03-01' = {
  name: 'test-app-20220906'
  location: location
  properties: {
    serverFarmId: appServicePlan.id
    httpsOnly: true
    enabled: true
  }
}

output appServiceAppHostName string = appServiceApp.properties.defaultHostName
ソースコードは、リソース名以外は 以前の記事 で使用したものをそのまま流用しています。
では、早速デプロイ……の前に、一度What-if操作を行なって、発生する変更を確認してみます。
2.2 What-if操作
What-if操作にはいくつかやり方があります。
az deployment group what-ifコマンドを使用するaz deployment group createコマンドに、--what-ifオプションをつけて実行するaz deployment group createコマンドに、--confirm-with-what-ifオプションをつけて実行する
ここでは、3. のやり方でやってみます。
--mode オプションにてデプロイモードが指定できますので、Complete(完全モード)を指定して実行します。
$ az deployment group create \
    --resource-group rg-blog-poc \
    --mode Complete \
    --confirm-with-what-if \
    --template-file main.bicep
Note: The result may contain false positive predictions (noise).
You can help us improve the accuracy of the result by opening an issue here: https://aka.ms/WhatIfIssues

Resource and property changes are indicated with this symbol:
  + Create

The deployment will update the following scope:

Scope: /subscriptions/xxxxxxxx-xxxx-xxxx-xxxx-xxxxxxxxxxxx/resourceGroups/rg-blog-poc

  + Microsoft.Web/serverfarms/test-app-service-plan [2021-03-01]

      apiVersion: "2021-03-01"
      id:         "/subscriptions/xxxxxxxx-xxxxxxxxxxxxxx-xxxxxxxxxxxx/resourceGroups/rg-blog-poc/providers/Microsoft.Web/serverfarms/test-app-service-plan"
      location:   "japaneast"
      name:       "test-app-service-plan"
      sku.name:   "F1"
      type:       "Microsoft.Web/serverfarms"

  + Microsoft.Web/sites/test-app-20220906 [2021-03-01]

      apiVersion:              "2021-03-01"
      id:                      "/subscriptions/xxxxxxxx-xxxxxxxxxxxxxx-xxxxxxxxxxxx/resourceGroups/rg-blog-poc/providers/Microsoft.Web/sites/test-app-20220906"
      location:                "japaneast"
      name:                    "test-app-20220906"
      properties.enabled:      true
      properties.httpsOnly:    true
      properties.serverFarmId: "/subscriptions/xxxxxxxx-xxxxxxxxxxxxxx-xxxxxxxxxxxx/resourceGroups/rg-blog-poc/providers/Microsoft.Web/serverfarms/test-app-service-plan"
      type:                    "Microsoft.Web/sites"

Resource changes: 2 to create.

Are you sure you want to execute the deployment? (y/n):
+ マークや、Resource changes: 2 to create. という出力から、2つのリソースが新規作成されることが確認できますね。
このままデプロイに進んでいきましょう。
2.3 デプロイ(2つのリソース)
発生する変更が確認できたので、デプロイしていきます。
先ほどの出力結果に、 Are you sure you want to execute the deployment? (y/n): という行がありましたね。
ここで、y を入力してEnterキーを押すと、そのままデプロイが始まります。
(省略)

Are you sure you want to execute the deployment? (y/n): y
デプロイが完了するまでしばらく待ちます。
2.4 リソースの確認
デプロイが完了したら、作成されたリソースを確認してみましょう。
以下のコマンドで、リソースグループを指定して、中身のリソースを確認できます。
$ az resource list \
    --resource-group rg-blog-poc
[
  {
    "changedTime": "2022-09-08T04:30:39.729119+00:00",
    "createdTime": "2022-09-08T04:20:38.571731+00:00",
    "extendedLocation": null,
    "id": "/subscriptions/xxxxxxxx-xxxx-xxxx-xxxx-xxxxxxxxxxxx/resourceGroups/rg-blog-poc/providers/Microsoft.Web/serverFarms/test-app-service-plan",
    "identity": null,
    "kind": "app",
    "location": "japaneast",
    "managedBy": null,
    "name": "test-app-service-plan",
    "plan": null,
    "properties": null,
    "provisioningState": "Succeeded",
    "resourceGroup": "rg-blog-poc",
    "sku": {
      "capacity": 0,
      "family": "F",
      "model": null,
      "name": "F1",
      "size": "F1",
      "tier": "Free"
    },
    "tags": null,
    "type": "Microsoft.Web/serverFarms"
  },
  {
    "changedTime": "2022-09-08T04:30:44.751502+00:00",
    "createdTime": "2022-09-08T04:20:42.946499+00:00",
    "extendedLocation": null,
    "id": "/subscriptions/xxxxxxxx-xxxx-xxxx-xxxx-xxxxxxxxxxxx/resourceGroups/rg-blog-poc/providers/Microsoft.Web/sites/test-app-20220906",
    "identity": null,
    "kind": "app",
    "location": "japaneast",
    "managedBy": null,
    "name": "test-app-20220906",
    "plan": null,
    "properties": null,
    "provisioningState": "Succeeded",
    "resourceGroup": "rg-blog-poc",
    "sku": null,
    "tags": null,
    "type": "Microsoft.Web/sites"
  }
]
2つのリソースが作成されていることが確認できますね。
さて次は、test-app-20220906 の削除を試してみることにしましょう。
3. リソースの削除
3.1 ソースコードの修正(1つのリソースをコメントアウト)
main.bicep を修正して、リソース test-app-20220906 をコメントアウトします。
この時、outputで出力していた部分も同時にコメントアウトしておきます。
(コメントアウトするリソースの情報をoutputとして出力しているため)
@description('リソースをデプロイするAzureのリージョン')
param location string = resourceGroup().location

// App Serviceプランで料金プランを設定
resource appServicePlan 'Microsoft.Web/serverfarms@2021-03-01' = {
  name: 'test-app-service-plan'
  location: location
  sku: {
    name: 'F1'
  }
}

/*
App ServiceでWebアプリを作成
httpsOnlyをtrueにして、WebアプリへHTTPSでアクセスするようにする
*/
// resource appServiceApp 'Microsoft.Web/sites@2021-03-01' = {
//   name: 'test-app-20220906'
//   location: location
//   properties: {
//     serverFarmId: appServicePlan.id
//     httpsOnly: true
//     enabled: true
//   }
// }

// output appServiceAppHostName string = appServiceApp.properties.defaultHostName
ファイルの修正ができたら、What-if操作を実行してみます。
3.2 What-if 操作
ここでは、az deployment group what-if コマンドを使用する方法(上記 2.2 で記載していたWhat-if操作の内、1. の方法)でWhat-if操作をしてみます。
こちらのコマンドでも、--mode オプションにて完全モードを指定できます。
$ az deployment group what-if \
    --resource-group rg-blog-poc \
    --mode Complete \
    --template-file main.bicep

〜省略〜

Resource and property changes are indicated with these symbols:
  = Nochange
  * Ignore

The deployment will update the following scope:

Scope: /subscriptions/f75143a4-40fc-4e4b-b56f-79b4cd736ccc/resourceGroups/rg-blog-poc

  = Microsoft.Web/serverfarms/test-app-service-plan [2021-03-01]
  * Microsoft.Web/sites/test-app-20220906

Resource changes: 1 no change, 1 to ignore.
あれ? リソースを削除するために完全モードを指定したのですが、Ignore(無視)になってますね……
一旦 az deployment group create コマンドを使用する方法も試してみることにします。
$ az deployment group create \
    --resource-group rg-blog-poc \
    --mode Complete \
    --confirm-with-what-if \
    --template-file main.bicep

〜省略〜

Resource and property changes are indicated with these symbols:
  - Delete
  = Nochange

The deployment will update the following scope:

Scope: /subscriptions/f75143a4-40fc-4e4b-b56f-79b4cd736ccc/resourceGroups/rg-blog-poc

  - Microsoft.Web/sites/test-app-20220906

      id:       "/subscriptions/f75143a4-40fc-4e4b-b56f-79b4cd736ccc/resourceGroups/rg-blog-poc/providers/Microsoft.Web/sites/test-app-20220906"
      kind:     "app"
      location: "japaneast"
      name:     "test-app-20220906"
      type:     "Microsoft.Web/sites"

  = Microsoft.Web/serverfarms/test-app-service-plan [2021-03-01]

Resource changes: 1 to delete, 1 no change.

Are you sure you want to execute the deployment? (y/n):
こちらだと Delete(削除)になっていますね。
期待する動作としてはこっちなので、以降はこの方法でWhat-if操作をすることにします。
(azure-cliのGitHubリポジトリ や BicepのGitHubリポジトリ のIssuesも探してみたのですが、上記事象のIssueらしきものは発見できずでした……) *1
3.3 デプロイ(リソースの削除)
では、先程と同じように y キー → Enterキー でデプロイしていきましょう。
〜省略〜

Are you sure you want to execute the deployment? (y/n): y
3.4 リソースの確認
デプロイ完了後、リソースの確認をします。
$ az resource list \
    --resource-group rg-blog-poc
[
  {
    "changedTime": "2022-09-08T05:40:20.743962+00:00",
    "createdTime": "2022-09-08T04:20:38.571731+00:00",
    "extendedLocation": null,
    "id": "/subscriptions/f75143a4-40fc-4e4b-b56f-79b4cd736ccc/resourceGroups/rg-blog-poc/providers/Microsoft.Web/serverFarms/test-app-service-plan",
    "identity": null,
    "kind": "app",
    "location": "japaneast",
    "managedBy": null,
    "name": "test-app-service-plan",
    "plan": null,
    "properties": null,
    "provisioningState": "Succeeded",
    "resourceGroup": "rg-blog-poc",
    "sku": {
      "capacity": 0,
      "family": "F",
      "model": null,
      "name": "F1",
      "size": "F1",
      "tier": "Free"
    },
    "tags": null,
    "type": "Microsoft.Web/serverFarms"
  }
]
うんうん、ちゃんと削除されていますね。
完全モードでのリソースの削除について
リソースタイプによっては、完全モードでも削除されないリソースがあるので注意が必要です。
完全モード デプロイでの Azure リソースの削除 にて、完全モードのデプロイで削除されるか/されないかが、リソースごとに記載されています。
今回使用した Microsoft.Web/sites リソースは、上記で見たように完全モードのデプロイで削除されるリソースとなります。
4. リソースの追加
次は、リソースの追加を試してみましょう。
4.1 ソースコードの修正(2つのリソースに戻す)
先程コメントアウトした箇所のコメントアウトを外して、2.1 ソースコードの作成 の状態に戻します。
(ソースコードは省略します)
4.2 What-if 操作
$ az deployment group create \
    --resource-group rg-blog-poc \
    --mode Complete \
    --confirm-with-what-if \
    --template-file main.bicep

〜省略〜

Resource and property changes are indicated with this symbol:
  + Create

The deployment will update the following scope:

Scope: /subscriptions/f75143a4-40fc-4e4b-b56f-79b4cd736ccc/resourceGroups/rg-blog-poc

  + Microsoft.Web/serverfarms/test-app-service-plan [2021-03-01]

      apiVersion: "2021-03-01"
      id:         "/subscriptions/f75143a4-40fc-4e4b-b56f-79b4cd736ccc/resourceGroups/rg-blog-poc/providers/Microsoft.Web/serverfarms/test-app-service-plan"
      location:   "japaneast"
      name:       "test-app-service-plan"
      sku.name:   "F1"
      type:       "Microsoft.Web/serverfarms"

  + Microsoft.Web/sites/test-app-20220906 [2021-03-01]

      apiVersion:              "2021-03-01"
      id:                      "/subscriptions/f75143a4-40fc-4e4b-b56f-79b4cd736ccc/resourceGroups/rg-blog-poc/providers/Microsoft.Web/sites/test-app-20220906"
      location:                "japaneast"
      name:                    "test-app-20220906"
      properties.enabled:      true
      properties.httpsOnly:    true
      properties.serverFarmId: "/subscriptions/f75143a4-40fc-4e4b-b56f-79b4cd736ccc/resourceGroups/rg-blog-poc/providers/Microsoft.Web/serverfarms/test-app-service-plan"
      type:                    "Microsoft.Web/sites"

Resource changes: 2 to create.

Are you sure you want to execute the deployment? (y/n):
あれれ? 2つのリソースが追加されるという出力になっています……
一旦 n キーでデプロイをキャンセルして、もう一度リソースの確認をしてみます。
$ az resource list \
    --resource-group rg-blog-poc
[]
test-app-service-plan が消えてしまっています……
実際の運用でApp Serviceプランだけを作成することがあるかどうかはさておき、削除したリソースによっては、別のリソースも一緒に削除されてしまうパターンがありそうです。
このまま悩んでいても仕方ないので、ひとまずデプロイして、先に進むことにします。
4.3 デプロイ(リソースの追加)
これまでと同様に、以下コマンドを実行して、y キー → Enterキー でデプロイします。
$ az deployment group create \
    --resource-group rg-blog-poc \
    --mode Complete \
    --confirm-with-what-if \
    --template-file main.bicep

〜省略〜

Are you sure you want to execute the deployment? (y/n): y
5. リソースの更新
最後に、リソースの更新を試してみます。
5.1 ソースコードの修正(1つのリソースのプロパティを変更)
〜省略〜

resource appServiceApp 'Microsoft.Web/sites@2021-03-01' = {
  name: 'test-app-20220906'
  location: location
  properties: {
    serverFarmId: appServicePlan.id
    httpsOnly: true
    enabled: false // ⇦ここをfalseに変えた
  }
}

output appServiceAppHostName string = appServiceApp.properties.defaultHostName
test-app-20220906 のプロパティ enabled を false に変更してみました。
ここが true の状態(変更前の状態)でデプロイが成功すると、アプリのURLにアクセスした時に以下の画面が表示されます。
(アプリのURLは、デプロイの「出力」にて確認できます)

5.2 What-if操作
では、What-ifを見てみましょう。
$ az deployment group create \
    --resource-group rg-blog-poc \
    --mode Complete \
    --confirm-with-what-if \
    --template-file main.bicep

〜省略〜

Resource and property changes are indicated with these symbols:
  + Create
  ~ Modify
  = Nochange

The deployment will update the following scope:

Scope: /subscriptions/f75143a4-40fc-4e4b-b56f-79b4cd736ccc/resourceGroups/rg-blog-poc

  ~ Microsoft.Web/sites/test-app-20220906 [2021-03-01]

〜省略〜

    ~ properties.enabled:                        true => false // ⇦ ここが変更箇所

  = Microsoft.Web/serverfarms/test-app-service-plan [2021-03-01]

Resource changes: 1 to modify, 1 no change.

Are you sure you want to execute the deployment? (y/n):
properties.enabled が変更されることが確認できますね。
デプロイしていきましょう!
5.3 デプロイ(リソースの更新)
もう見慣れてきたかと思いますが、y キー → Enterキー でデプロイです。
〜省略〜

Are you sure you want to execute the deployment? (y/n): y
5.4 変更内容の確認
では、変更が反映されたか確認してみます。
以下のコマンドで、test-app-20220906 の詳細を表示します。
$ az webapp show \
    --name test-app-20220906 \
    --resource-group rg-blog-poc
{

〜省略〜

  "enabled": false,

〜省略〜

}
変更が反映されていますね。
アプリのURLにアクセスしてみると……
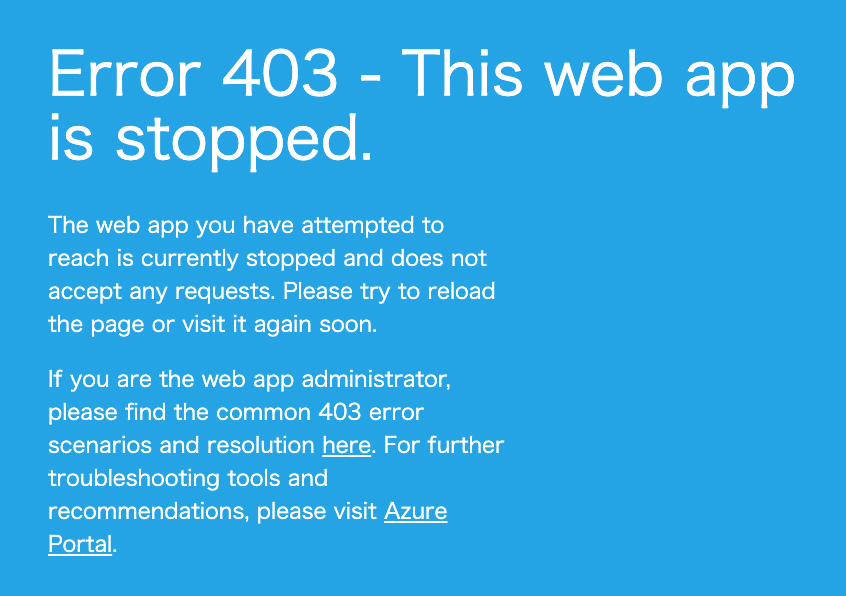
アプリが停止している旨が表示されました。
6. お片付け
リソースの作成・追加・削除・更新が確認できたところで、お片付けに入っていきます。
※本記事の内容を見て一緒に実践してくださっている方、ありがとうございます! お片付けの手順は必要に応じて実施ください。
6.1 リソースグループの削除
テスト用に作成したリソースグループごと削除すれば、お片付け完了です。
(他のリソースグループが既にある場合は、そちらを消さないように、リソースグループ名に注意!)
az group delete \
    --name rg-blog-poc
Are you sure you want to perform this operation? (y/n): y
おわりに
以上、今回は完全モードを使用したBicepファイルからのリソース追加・削除・更新を実践してみました。
コマンドによってWhat-ifの結果が変わったり、リソースの削除時に別のリソースも一緒に削除されることがあったり、なかなか一筋縄ではいかなさそうですね。
引き続き、研鑽を重ねていきたいと思います。
ではでは、またお会いしましょう!
参考情報リンクまとめ
- Azure Resource Manager のデプロイ モード
- Bicep デプロイの What-If 操作
- 完全モード デプロイでの Azure リソースの削除
- azure-cliのGitHubリポジトリ
- BicepのGitHubリポジトリ
Bicepを使ってみる 記事一覧
- AzureにおけるIaC Bicepに入門してみた
- Bicepを使ってみる① 〜完全モードでのデプロイ〜 ←本記事です
*1:後日、App Serviceのアプリではなく仮想ネットワーク(vnet)の削除も試してみたのですが、az deployment group what-if コマンドを使用する方法だと、同じようにIgnoreになっていました。